Thursday, April 24, 2014

Pork, zucchini, and yellow squash stew

Hello my dear readers! I am so sorry I've been MIA from my blog. I've been busy with traveling and a new job. Yes, I came out if "retirement" haha. I started working as a salesperson at a plumbing supply company. I know, weird, but, I am after all a plumbers daughter. I've been working there for 6 weeks now. I do like working there. It is something new for me. I went from being a nanny for 12 yrs to a salesperson at a plumbing supply. How did that happen? I have no idea...but I like it so far!

Anyhow, I get to come home and make dinner for the hubs and I. Tonight I made a special meal my mom used to make us when we were younger. It's healthy and delicious, so props to my mom!

So here's the recipe!


Pork, zucchini, and yellow squash stew

Ingredients:
-1 lb lean pork, cut in cubes
-1 medium zucchini, sliced
-1medium yellow squash, sliced
-5 Roma tomatoes, sliced
-1/2 onion, diced
-1/2 TBS ground cumin
-1 TBS olive oil
-1/2 water
-salt and pepper to taste


Directions:

1. Heat a pan on medium heat and add TBS of olive oil.
2. Add diced onions and cook for about a minute. Add the cubed pork and cook till browned, maybe 8 minutes.
3. Add sliced tomatoes and let it cook for about a minute and then add 1/2 water. Let it simmer for 10-15 minutes on medium low.
4. After tomatoes have cooked for a while, add the zucchini and squash. Put on low, cover and let it cook for another 10 minutes or until zucchini and squash are cooked.
5. Enjoy!


And that, my friends, is how you make a quick, healthy, and delicious meal! Hope you enjoy it as much as we did!

-Eat, love, laugh


Saturday, March 8, 2014

Baked Cauliflower with Pasta Sauce (Gluten Free)

Baked Cauliflower with Pasta Sauce (GF)
Ahhhhh...finally a weekend to relax and catch up on my blog. If you all didn't know, the hubs and I just got back from a fun trip just last Monday. We went to Disneyland for 7 days. If you have never been to Disney, well 7 days is a pretty long time to be there. Ha! But I loved every second of it. I did take my hubs to San Diego, Hollywood, and Venice Beach. He's only visited San Fransisco and so it was my opportunity to show him places I used to visit when I used to live 6 hrs away (Scottsdale, AZ). We had lots of fun, but we were tired! We were ready to go home and see our pups, Chief and Sarge.

Well, let me tell you exactly how we ended up being in California by accident. So awhile back, like 10 months ago, I registered for the Disney Princess Run half marathon. Well, I bought everything, booked our hotel, park tickets, car rental, and San Diego Zoo tickets through Costco (if you have membership with them and want to travel anywhere, they have great prices and packages). We had to book our flight separately, but that was no biggie. About a week before our trip, I get an email from "Disney" giving me details about weekend of the race and our way around DISNEYWORLD! Ummm...WHAT?! Yep, I had booked the wrong Disney...so long story short, I never got to run my Princess Run. Boo! Instead, the hubs wanted to go to Cali for a relaxing trip. I was in tears, but there's always next year. Ha! Moral of the story, make sure you read everything before you book any of your trips. 

Ok, so I'm sure you've been patiently waiting for the recipe. This Baked Cauliflower with Pasta Sauce is amazing! I know I say that about all of my recipes, but I wouldn't post them if it weren't true. Ha! But seriously, this stuff is so yummy. How many of you love traveling and eating at new places? All of us, right? After a while, we all get tired of eating out all the time. I get tired of eating out after day 1 of any trip. I wanted to come home and make something hearty, healthy, delicious, and gluten free. That's how I ended up with this gorgeous creation! Check it out 


You won't miss the pasta! Trust me, my hubs didn't and he's a pasta man.

So enough of the teasing, here's the recipe! 


Baked Cauliflower with Pasta Sauce
Ingredients: 
  • 1 Head of Cauliflower cut in florets
  • small green bell pepper, diced
  • small red bell pepper, diced
  • 1/2 yellow onion, diced
  • 1 TBS Mediterranean oil (Olive or Coconut oil is great too)
  • 1 lb of lean ground turkey
  •  1 cup of diced roma tomatoes
  • 1 1/2 cup of your favorite marinara sauce (I love Gina Rispoli, all natural and organic, yum!) 
  • sea salt and pepper to taste 
      *I added mozzarella and Parmesan cheese to the turkey mixture and baked it. I only added about 1/2 cup of mozzarella and sprinkled a bit of Parm.

Directions:
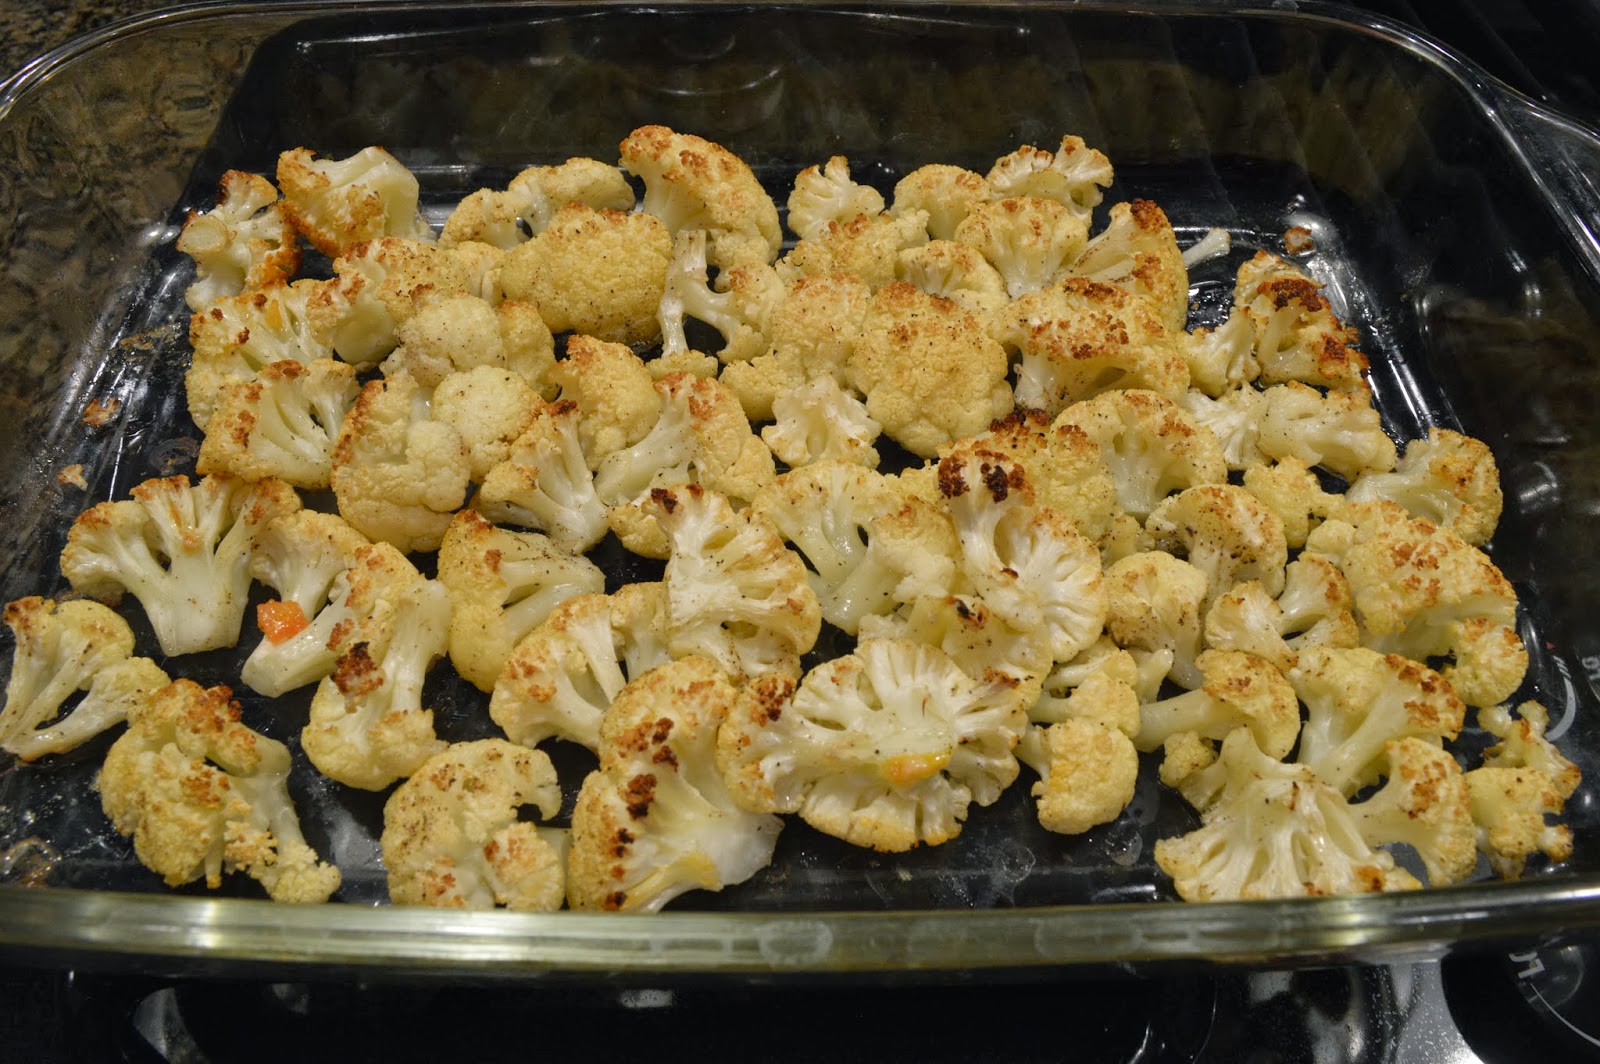
  1. Preheat oven to 375 degrees F* While oven is preheating, cut the cauliflower in florets and place in a large bowl. Drizzle a little bit of Mediterranean oil (or your favorite healthy oil), salt and pepper. Place in a oven proof baking dish. By now, the oven should be preheated, so go ahead and place the cauliflower to bake for 25 minutes or until browned.
  2. While the cauliflower is baking, dice the peppers and tomatoes. Set aside. Dice the onions and cook in pan with the TBS of oil. When the onions look translucent add the ground turkey and cook till browned.
  3. Add the bell peppers to the turkey mixture and cook till tender. Then add the roma tomatoes and cook for about 3 minutes.
  4. Add the marinara sauce to the mixture and let it simmer till the cauliflower is done baking. Should be about 10 minutes or so. 
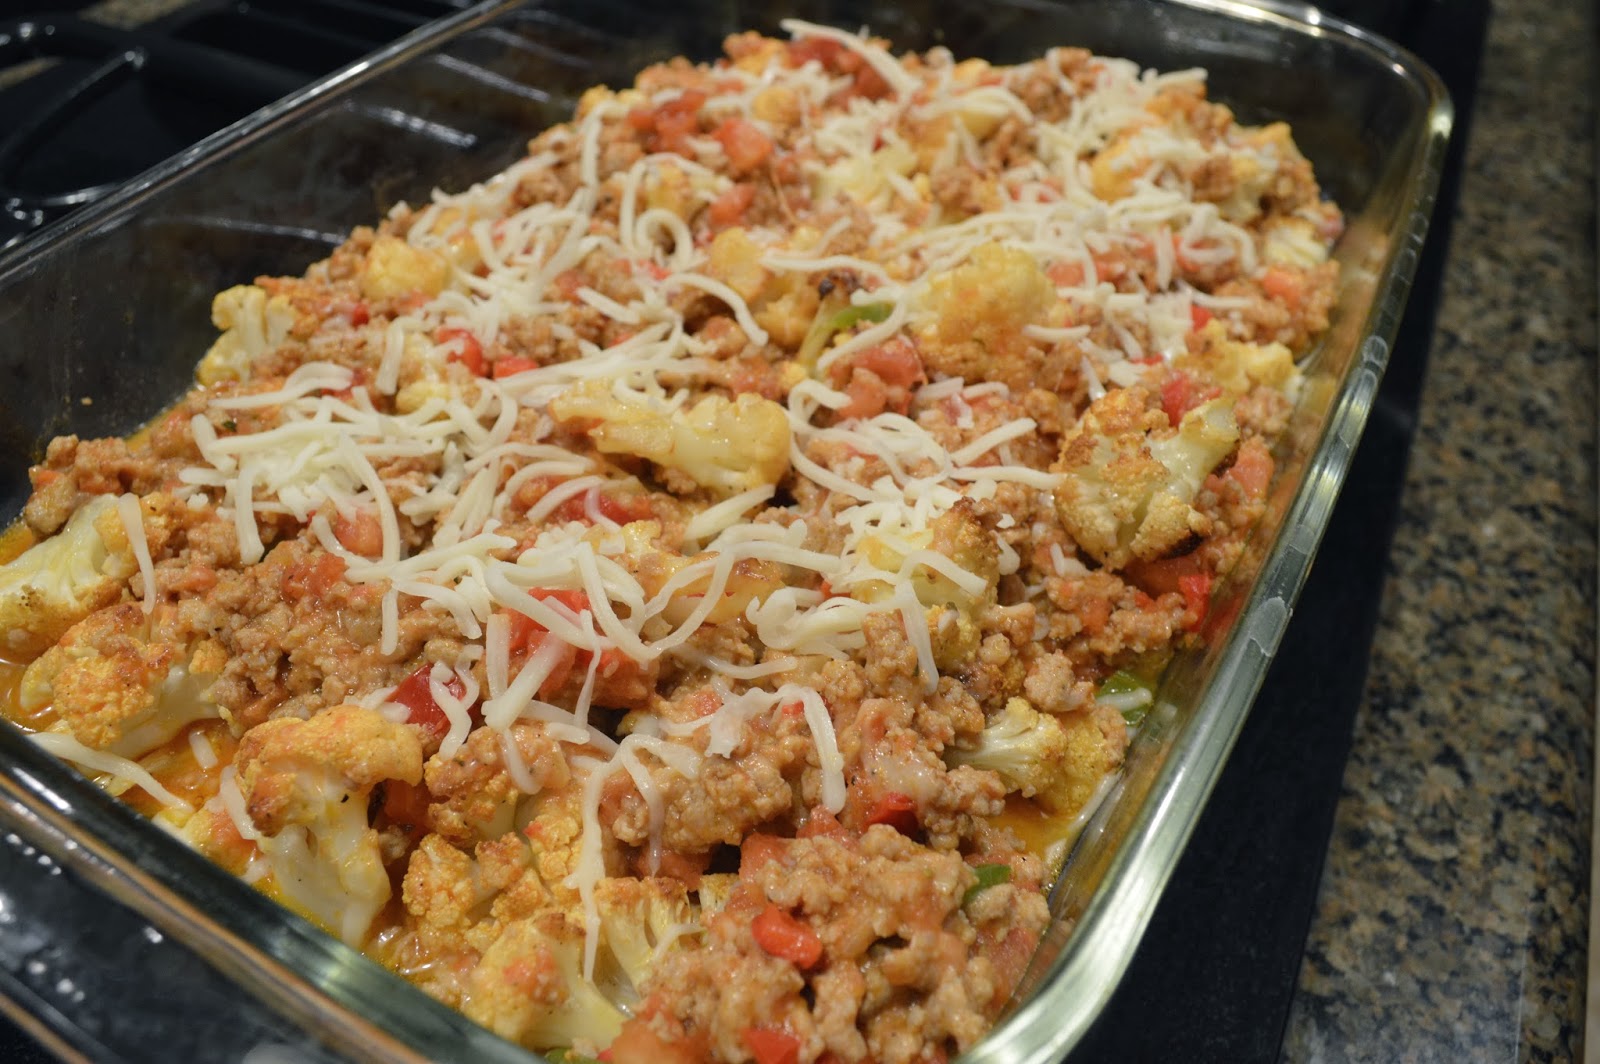
  5. Take out cauliflower when done and if you are mixing in the cheese that I suggested above, add it to the pasta sauce. Add pasta sauce mixture to baked cauliflower and mix a little bit.
  6. Put the pasta back in the oven and let it cook for about 12 minutes. Let it cool off a bit before serving. Add some crush red pepper and a little bit of parmesan for a little kick. Yum!
  7.  Enjoy!
 
Well folks, like always, I would love to hear your opinions if you do try any of my recipes. I appreciate all of my readers and followers!
 
-Eat, Laugh, Love

Wednesday, February 12, 2014

Banh Mi (Vietnamese Sandwiches)

Hi folks! Sorry that I've been MIA lately with my posts. I've been preparing for our California week long vacation happening next week. I haven't really prepared anything new this week, so I didn't really have much to blog about. Also, even though I work from home and can be in my PJ's all day long, going to our office from my comfy bed just seems like a hassle. I know, shame on me! But hey, I got dressed and decided to post this beautiful recipe.

                                                                          Isn't a beaut?!

 So, like 10 yrs ago, a really good friend of mine took me out on the town and we had a really awesome adventurous day. He took me to an Asian Market (one of my favorite markets, if I may add) and bought me my first Banh Mi. Instantly I fell in love with those delicious Vietnamese Sandwiches. So last week I was craving Vietnamese food. Then, I started craving specifically Banh Mis. I Googled a few recipes to get an idea of how to marinade the pork. The marination is the part that makes these sandwiches the bomb-diggity. Took me awhile but I finally got the perfect recipe.


                                                           Look at that beautiful color


                                                       Fish sauce, green onions, and honey

                                                    Grilling those yummy pork chops


                                                         Oh my word...drool fest!


                                                And yes, I made my very own "special" sauce


                                      Letting the shredded carrots pickle in some apple cider
 (sorry about the broken bowl, I refuse to throw it away. I just can't seem to find another one like it)

Sorry I don't have enough pictures for ya...haha! Kidding! I know I went a little overboard with the picture taking, but you gotta admit, you are glad I did so, wink wink! Well, here's the recipe for ya! Give it a try and let me know what you think.


Banh Mi recipe

Ingredients:
  • 4 pork tenderloins
  • 4 TBS Fish Sauce (Smells stinky, but it is yummy)
  • 7 green onions (sliced)
  • 1 big squeeze of honey (I guess 1 TBS oops!)
  • 1 TBS of sugar
  • 2 garlic cloves (you can use about 3 tsp of garlic powder if needed)
  • 2 TBS cooking oil
  • shredded carrots
  • 1/2 apple cider for carrot pickling
  • cilantro 
  • 2 jalapenos (seeded and cut lengthwise)
  • 1 cucumber (seeded and cut lenghtwise) 
  • 4 Bolillos or French bread
  •  4 TBS of Mayo 
  • 2 TBS of Sriracha Sauce 
 Directions:
  1. Add the sliced green onions, fish sauce, honey, sugar, and garlic cloves in a blender and blend till watery. Add the marinade in a medium bowl with 2 TBS of cooking oil.
  2.  In a separate bowl, add shredded carrots and apple cider with 1/4 water and set aside until you are ready to add it to the Bolillos.
  3. Wash and dry your pork tenderloins and add to medium bowl with the fishy sauce. Work the meat into the marinade to make sure every piece gets coated. Cover with saran wrap and refrigerate for at least 30 minutes. It can be done overnight if you want.
  4. While everything is set aside, cut and seed your jalapenos and cucumber. 
  5. After pork is done marinading, grill for about 6 minutes each side or until it is well done.
  6. In a small bowl add the mayo and sriracha sauce and mix. 
  7. Prepare your sandwiches by adding as much of the "special" sauce on the bread. Next, add the pork, cucumbers, jalapenos, shredded carrots, and cilantro.
  8. Stuff your face and enjoy all the yummy flavors. It will forever change your life...I'm serious!
Like always my dear readers, thank you for stopping by my blog and hope you enjoy eating as much as I enjoy sharing it with you. Much love to all! 

-Eat, Laugh, Love


Wednesday, February 5, 2014

Cauliflower Buffalo "Wings"


Hey all! It's been a pretty crazy start of 2014 for me. I've been traveling a lot and trying to sell the house...I love the traveling part, but the selling...well, not so much. I mean, I'm excited to sell my house and move into a new home, but the showings is what's killing me, smalls (If you know what movie I just quoted, then you get extra brownie points). I hate having to stop what I'm doing in order to clean the house and they give me about an hour to do so. Oh, and on top of that, I have to pack my crazy dogs in the car. Blegh!

Sooooo...It was nice to stay home on Super Bowl day. We usually throw a small party with a few of our friends, but I told my husband, I needed a break. I loooove parties, but I go a little crazy when it comes to cooking. See, I have a problem with stopping at a few appetizers. If we invite 4 friends, I make enough for 4 friends plus 30 more...YIKES! Well, I made an appetizer that is truly delicious and best of all healthy! I made some delicious gluten-free Cauliflower Buffalo "Wings." So easy and yummy. My hubs couldn't stop eating them! So scroll on down to check out my recipe. You won't be sorry :-)


Cauliflower Buffalo "Wings"

Ingredients:
  • 1 medium size head of cauliflower
  • 1/2 gluten free flour (I use Trader Joe's gluten-free flour)
  • 1/2 coconut milk (use any type of milk you want)
  • 1/2 TBS cayenne pepper (if you like yours extra hot)
  • 1/2 cup Frank's buffalo hot sauce
  • 2 TBS melted butter 
Directions:
  1. Preheat oven to 425 F* degrees. Line a cookie sheet with aluminum foil and spray with cooking spray (I use coconut oil)
  2. Chop up the cauliflower into wing sized. I used all of my cauliflower, but for two people it was a lot.
  3. Mix the flour, milk, and cayenne pepper in a medium mixing bowl. Mix till everything is well blended.
  4. Dip the "wings" into the flour mixture and let some of the mixture drip off and place on oiled cookie sheet.
  5. Place cookie sheet in preheated oven and bake for about 20-25 minutes, depending on how crispy you want your "wings."
  6. A few minutes before the "wings" are done, prepare the buffalo sauce. Place hot sauce and butter in a microwavable measuring cup and heat for 2 minutes or until butter has melted. 
  7. When "wings" are done, let it cool off for a bit and place them in a large mixing bowl. Add the hot sauce and toss around till it's coated in deliciousness. 
  8. Enjoy
 

And that, my dear friends, is how you make a delicious and healthy appetizer for any type of gathering. You will be asked for this recipe by the pickiest of eaters. I know, because my hubs is one of them. 

Thanks for stopping by to check out my blog!

-Eat, Love, Laugh

Monday, February 3, 2014

Brussels Sprouts Hash with Sweet Potato and baked Egg


Hi There! On Saturday (I'm a bit behind on my blogging) I created this delicious breakfast for my husband and I. I get tired of making waffles or pancakes, although, I'm sure my husband doesn't get tired of eating them, and so I decided to create something with more nutrients and vegetables. I had all the ingredients in my kitchen and after looking at recipes online, I came up with this recipe. Hope you enjoy this delicious and easy breakfast as much as we did!
 

Brussels Sprouts Hash with Sweet Potato and Baked Egg Recipe
Servings: 3
Ingredients:
  • Medium Sweet Potato peeled and cut in 1/2 inches
  • 1 lb of Brussels Sprouts cut in half
  • half sweet onion diced
  • 2 TBS of olive oil
  • 3 eggs
Directions:
  1. Peeled and cut the sweet potato in 1/2 inches and dice the onion. In a cast iron heat up the 2 TBS of oil and let it heat up on medium heat. Add the onion and sweet potato and cook for about 5 minutes until sweet potatoes are tender.
  2. Add the brussels sprouts to the cast iron and cook for about 4 minutes and let it sit for about 5 minutes until you see the bottom caramalize. Stir after letting it sit and make 3 wells in the hash and add the eggs in each well. Add salt and pepper to taste. You can cook the eggs on the stove or if you want your eggs well done, just preheat the oven at 375 and place the cast iron directly in the oven for about 10 minutes.
  3. You can add cheese or bacon after it's done.
  4. Enjoy!

                                               Brussels Sprouts and Sweet Potato

                                           Cooking the sweet potato and onions

                                Letting the sweet potato and brussels spours sit and cook
And that's it! Pretty easy and quick breakfast when you are tired of eating the same ol' stuff. Would love to know what you think, so don't be shy and leave a comment :-)
-Eat, Love, Laugh

Healthy Chiles Rellenos (Stuffed Peppers)


Hey there!
Thanks for stopping by to check out my blog. I'm very excited to get started and help each and everyone of you how to eat healthy and be fit, while having lots of fun! So let's get started!

I recently just became a housewife after 11 years of being a nanny and let me tell you, it's a wonderful feeling to be able to start cooking at a decent time. I used to come home and start cooking at 7pm. I was already tired and didn't want to bother making an elaborate meal just for the hubs and I. I would pretty much make the same meals over and over again. Delicious and healthy they were, but we kind of got burnt out.
So yesterday I was talking to my mom on the phone and I just started craving her amazing Chiles Rellenos or Stuffed Peppers but these are Guatemalan style. I had all but one of the ingredients at hand and headed to the store. I was really excited to try out a recipe my mother would make on special occasions and I was goign to get a feel of the hard work she would put just to make these amazing Stuffed Peppers.


                                      Here are the ingredients for Chiles Rellenos
Now, I apologize if you start to drool just by looking at these pictures...
                                                   The mixture to stuff the peppers
  I'm not going to lie, but I did stuff myself with the mixture. It's so good just by itself as well. Yum!
                                   All stuffed and ready to be dipped in the egg mixture


Are you ready for this next picture? Dun, dun, duuuuuun....


                                 It was soooo amazing and gluten free!


So here's the recipe if you are brave enough to make them:

Serving Size: 4 (Makes about 6-8 depending on size of peppers)
Time: Prep 15 minutes
       :Cook 45 minutes
Ready in about 1 hour
Ingredients:
  • 4 poblano peppers
  • 1 russet potato (peeled and diced in small pieces
  • 2 carrots (peeled and diced in small pieces
  • handful of fresh green beans (diced in small pieces)
  • 2 chicken breasts (boiled and chopped in small pieces)
  • 1 tomato (diced)
  • half diced onion
  • 2 eggs room temperature (whites and yolks separated)
  • 1 teaspoon of almond flour (You can use regular flour if you want)
  • 1 bay leaf
  • 1/2 tsp of oregano
  • salt and pepper to taste
  • Cooking oil for frying the stuffed peppers
Directions:
  1. Cut the poblano peppers in half and clean out the inside. Heat up and outdoor or indoor grill. You will need to grill the outside of the peppers so that later you can peel the skin as much as you can. Set them aside when the flesh looks a little burnt and wrap them up in a wet paper towel.
  2. Boil the chicken breasts with enough water to cover them, add salt and the bay leaf for flavor. Boil until chicken is cooked. Chop into small pieces and set aside.
  3. Remember all the vegatables you diced up in the beginning? Yeah, we are goign to boil thoses as well. I usually boil them in separate pans, but if you don't have 3 small pans, just boil the potatoes and carrots together and the grean beans separately (they cook faster). Once they are all cooked, drain the water and in a large bowl combine the chicken, potato, carrots, and green beans.
  4. In a frying pan add enough cooking oil to cover the pan (I use a meditarranean mix from Costco) and heat to medium/low. Add the onions and let them cook for about 1 minute. Then add the diced tomato and cook for about 1 minute. Once those veggies are cooked, add the chicken mixture to the pan and mix around so all the flavors combine. Add salt and pepper to taste and add the 1/2 teaspoon of Oregano to the mixture. Cook about 5 minutes. Start stuffing the peppers. You might have some mixture leftover and that's ok. You can eat it right out of the pan...yummy!
  5. The egg part! With a hand mixer, mix the egg whites until it becomes frotthy like whipped cream. Then one by one add the egg yolks until it's a thick cream. Then add that 1 tsp of almond flour (or your choice of flour) This needs to be thick for you to be able to cover the peppers in it.
  6. Heat up a separate frying pan on Medium/High with about 3 tablespoons of cooking oil
  7. Grab your peppers and slowly dunk them in to the egg cream just enough to cover them. Add them to the frying pan and cook both sides till the egg looks cooked. Be careful when turning the pepper onto the side that has the stuffing, it could fall out.
  8. ENJOY!

You can serve this with white rice and make a tomato sauce to add to the top of the peppers. Or you can just eat it by itself. My mom used to make sandwiches with the Chiles Rellenos. She would cut half a french bread in half and stuff it with the stuffed peppers and lettuce...amazing!

Again! Thanks for stopping by to check out my new blog. I cant't wait to share many more healhty recipes and work out tips with you once I start loading some of my workout routines. Comments are always welcome and make sure to check out my facebook page Click Here and find me on Instagram @Mrsbarker1


-Eat, Laugh, Love


Sweet Potato and Quinoa Patties


Sweet Potato and Quino Patties
If you are looking for something quick, easy, and delicious, then you came to the right place. Even my picky husband eats these and said he didn't miss meat at all...umm...SCORE!
The Sweet Potato and Quino Patties are so simple and delicious. You cam have them on a bun or I had mine on top of a bed of spinach with a Gucamole Sauce I made. Delicious!
Are you ready for the recipe, cause I'm getting hungry looking at my own pictures, haha!

Sweet Potato and Quinoa Patties Recipe

Ingredients:
  1. 2 cups cooked quinoa
  2. 2 medium size sweet potatoes (baked or boiled, I baked mine)
  3. 1/2 can of corn with red and green pepper (mexican style)
  4. 4 tbs of almond flour (or more if you feel that the patties are to watery)
  5. 1/2 tsp cumin
  6. 1/2 tsp garlic powder
  7. 1/2 onion powder
  8. salt and pepper to taste
Directions
  • Heat a pan with about 2 tbs of your choice of oil, I always use Medditarranean Blend Oil, on medium heat.
  • If you baked the sweet potatoes, let it cool and once they're cooled off, remove the skin and mash it in a mixib bowl. Add the cooked quinoa, and 1/2 can of the corn. Mix in the salt, pepper, garlic poweder, cumin, onion powder, and almond flour. Mix until well blended and you are able to form a patty.
  • This recipe made about 8 small to medium size patties. Add patties to heated oil one to two at a time. Let brown on both sides which should be about 4 minutes each side.


Guacamole Sauce Recipe
Ingredients:
  1. 1/2 avocado
  2. 2 tbs Greek yogurt (I love and use Chobani)
  3. 1/2 lime juice
Directions:
  • Mash the 1/2 avocado in a small bowl. Add the Greek yogurt and 1/2 lime juice. Mix all ingredients until it has a sauce consistency. Add salt and pepper if you want. Can be added to salads, roasted veggies, eggs, just about anything you want. It's an easy, healthy and delicious sauce.

And that, my dear readers, is how you make a quick, healthy, and delicious meal. Oh and gluten free as well. Hope you enjoy this recipe as much as we do at my house.

-Eat, Love, Laugh